Under > System Preferences > Keyboard > Input Sources on the Mac, there’s a checkbox for “Show Input Menu in menu bar”. Many know about this already as a quick way to get emoji and other symbols. It puts this icon ![]() , in the menu bar. Click the icon and choose “Show Emoji & Symbols”. Click the gear icon, and choose the “Customize list” option. Not all the symbol categories are turned on by default. I like to have most of them checked, especially when I’m on the hunt for a particular character. Check the ones that interest you.
, in the menu bar. Click the icon and choose “Show Emoji & Symbols”. Click the gear icon, and choose the “Customize list” option. Not all the symbol categories are turned on by default. I like to have most of them checked, especially when I’m on the hunt for a particular character. Check the ones that interest you.
I’ve created some Keyboard Maestro shortcuts (TextExpander could be used, or even Apple’s own text replacement tool, found in > System Preferences > Keyboard > Text) to quickly get symbols I use often. The reason I prefer to use Keyboard Maestro over the Apple Text option is that KM’s macros will sync to my other computers. This means I only have to set this up once! TextExpander has a similar syncing option, too.
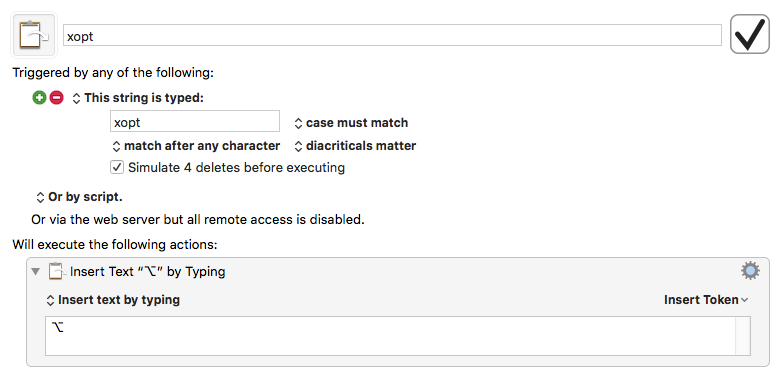
This shows how I set up a Keyboard Maestro shortcut for the option key symbol:

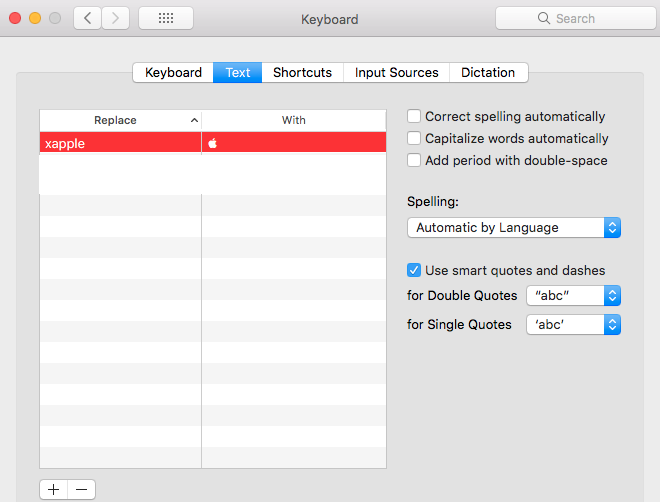
Here’s how to do it using Apple’s text replacement tool:

If you’re trying to explain something to someone, and it involves keyboard shortcuts, you might like to be able to use the symbols ⇧ (shift), ⌥ (option), and/or ⌘ (command) in your text instead of using the words. I use xshift, xoption, and xcom as my trigger texts for those. But there are hundreds of great symbols at your disposal, so make shortcuts for the ones you use often and save yourself several steps. Whether you use Apple’s text replacement tool, TextExpander, or Keyboard Maestro, be sure to choose a unique trigger. I like to begin mine with the letter x or with a mark of punctuation—but choose wisely!
This technique is not limited to the Mac. iOS can handle text replacements, too! In iOS, go to Settings > General > Keyboard > Text Replacement. Sadly, iOS cannot handle emoji in its text replacement, only characters from the keyboard. ◼︎